MainStoryboardを使わずに画面を表示させていきます。
コピー&ペーストでわずかプロジェクト作成からわずか3分で実装できます。
目次
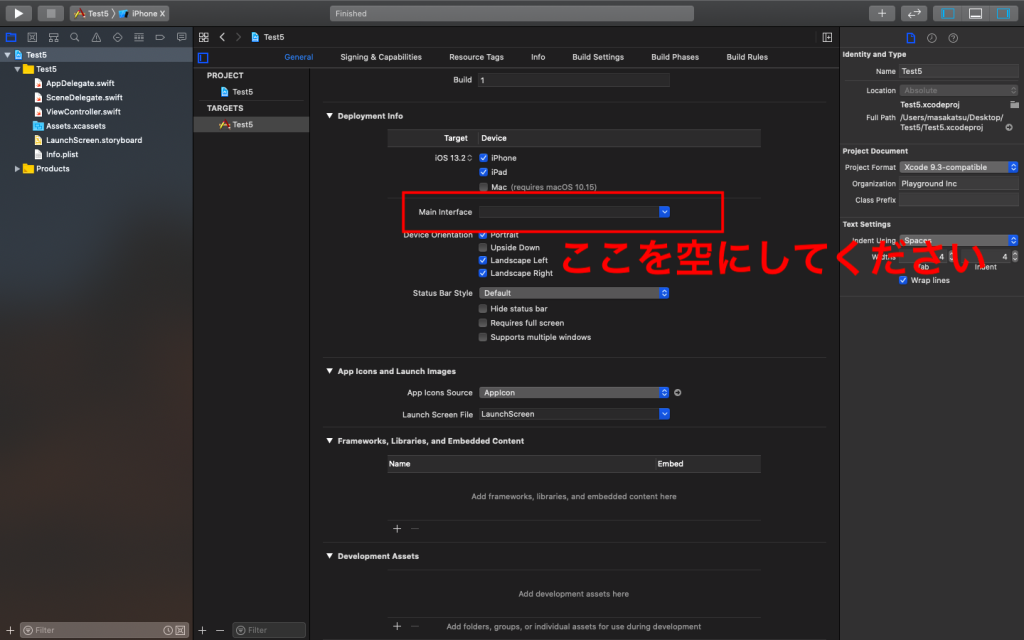
1 – Main Interface の項目を空にする
MainStoryboardが初めに来るように設定されているので、こちらを変更してください。始めはMainと書かれているのでこちらを消して空にしてください。
2- info.plistの設定を変更します
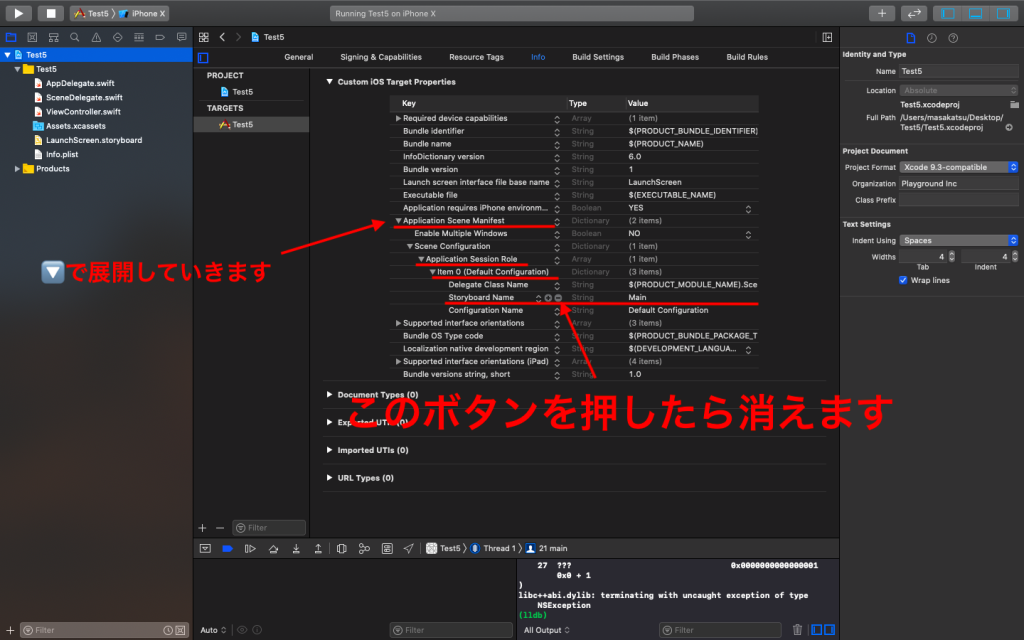
画像を参考にしてみてください。
[Application Scene Manifest] → [Scene Configuration]
-> [Application SessionRole] -> [Item 0(default Configuration)]
のStoryboard Nameを削除してください。
3- SceneDelegateの箇所にコードを加えます
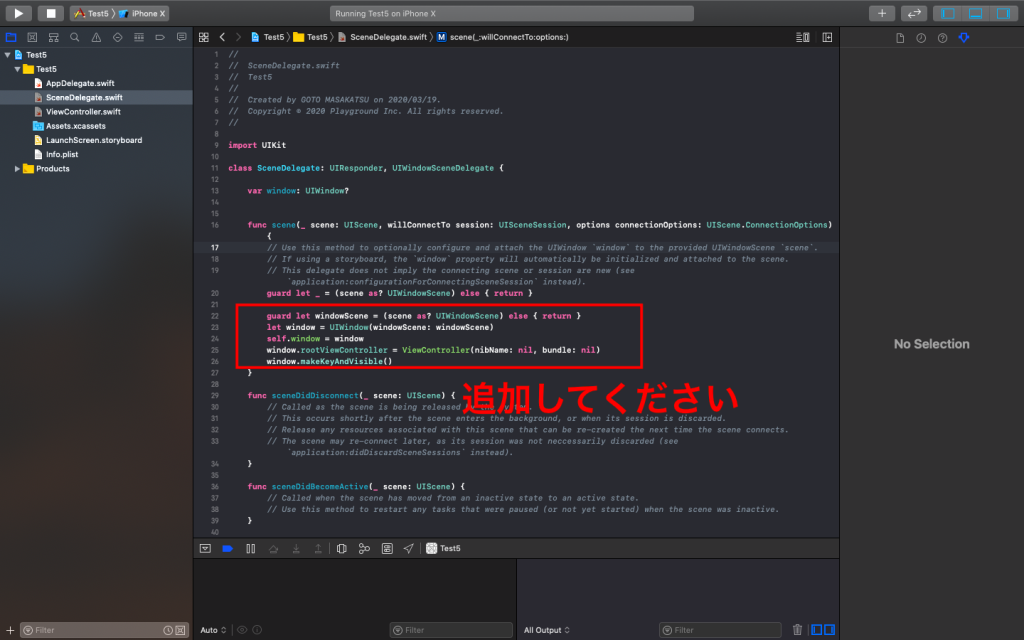
 guard let windowScene = (scene as? UIWindowScene) else { return }
 let window = UIWindow(windowScene: windowScene)
 self.window = window
 window.rootViewController = ViewController(nibName: nil, bundle: nil)
 window.makeKeyAndVisible()
4- ViewControllerにコードを追加します
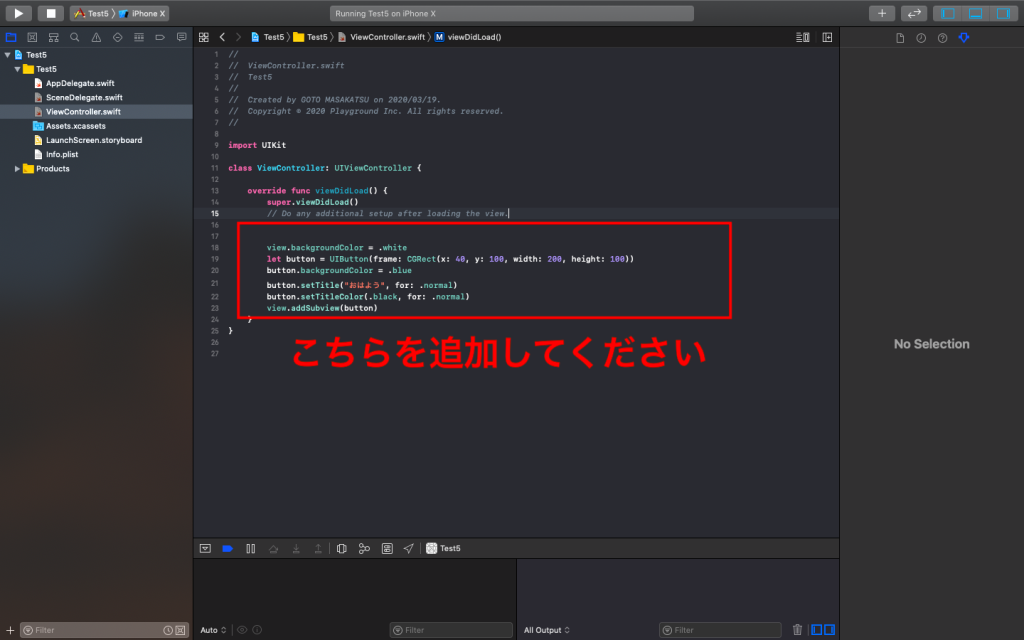
view.backgroundColor = .white
let button = UIButton(frame: CGRect(x: 40, y: 100, width: 200, height: 100))
button.backgroundColor = .blue
button.setTitle("おはよう", for: .normal)
button.setTitleColor(.black, for: .normal)
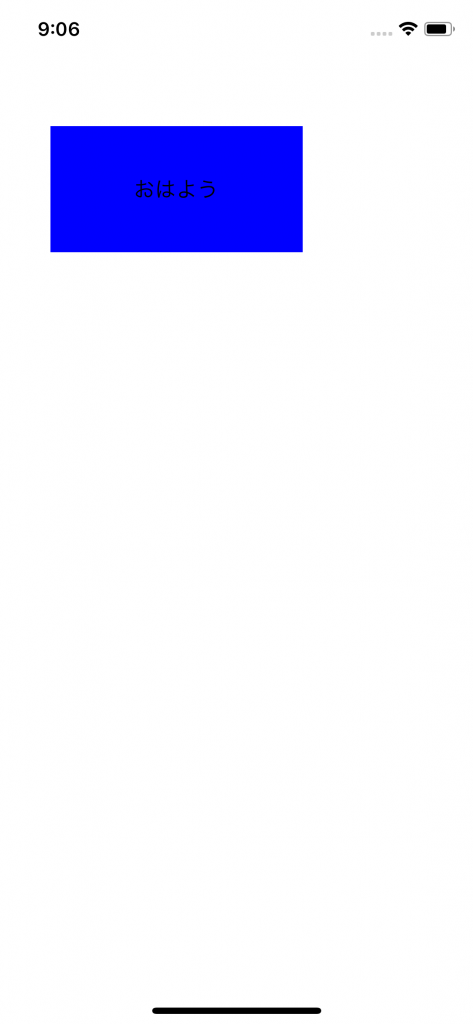
view.addSubview(button)5- 実際にBuildして確認してみてください
ABOUT ME
株式会社Playgroundのサービス
- 無料・簡単・片手でホームページを作成できる自社サービス Rakwi
- Web制作とアプリ開発を学べるオンラインプログラミング講座 Upstairs
- 開発,DX推進支援サービス スタートアッププラン